Introduction
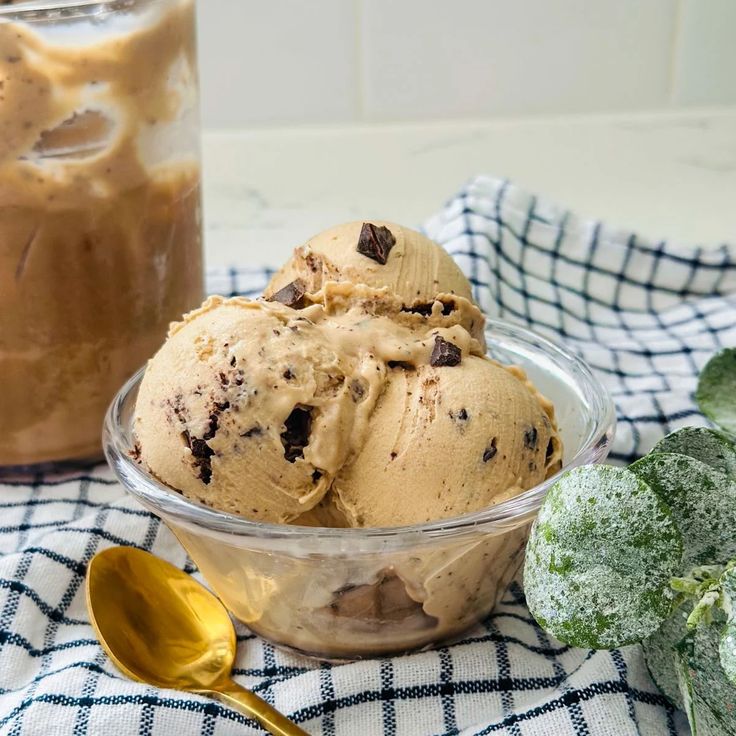
Ninja Creami Maple Ice Cream is a smooth, creamy dessert with a rich and natural maple flavor. It is sweet, comforting, and perfect for anyone who enjoys classic homemade ice cream. The natural taste of maple syrup gives this ice cream a warm and slightly caramel-like flavor that feels both simple and special.
One of the best things about this recipe is that it is made using the Ninja Creami, a popular machine designed to turn frozen bases into creamy desserts. With this machine, making ice cream at home becomes much easier. You simply prepare the mixture, freeze it, and then let the machine spin it into a smooth and fluffy texture.
Maple ice cream is a great dessert for many occasions. It tastes wonderful on warm desserts like apple pie or pancakes, but it is also delicious on its own. Because it uses simple ingredients, the flavor stays clean and natural.
If you enjoy homemade ice cream with a rich flavor and creamy texture, Ninja Creami Maple Ice Cream is a wonderful recipe to try.
Cooking Time & Prep Time
- Prep Time: 10 minutes
- Freezing Time: 12–24 hours
- Processing Time (Ninja Creami): 3–5 minutes
- Total Time: About 12–24 hours (including freezing)
- Servings: 4 servings
The longest step is freezing the base, which helps create the perfect creamy texture.
Ingredients
- 1 cup heavy cream
- 1 cup whole milk
- ½ cup pure maple syrup
- 1 teaspoon vanilla extract
- ¼ teaspoon salt
Optional Add-Ins
- ¼ cup chopped pecans
- ¼ cup walnuts
- 2 tablespoons maple sugar
- ¼ cup chocolate chips
Tip: Use pure maple syrup, not pancake syrup, for the best flavor.
Step-by-Step Instructions
1. Mix the Base
In a medium mixing bowl, combine:
- Heavy cream
- Whole milk
- Maple syrup
- Vanilla extract
- Salt
Whisk the ingredients together until the mixture becomes smooth.
Small tip: Stir slowly so the cream does not become too frothy.
2. Pour into the Ninja Creami Container
Pour the mixture into the Ninja Creami pint container.
Make sure the liquid stays below the maximum fill line.
Place the lid securely on the container.
3. Freeze the Mixture
Place the container in the freezer.
Freeze for at least 12 hours, or until the mixture is completely solid.
This step is important because the Ninja Creami works best with a fully frozen base.
4. Prepare the Machine
Once frozen, remove the lid from the container.
Place the frozen container into the Ninja Creami outer bowl.
Attach the lid with the blade assembly.
Lock the bowl into the machine.
5. Spin the Ice Cream
Select the Ice Cream function on the Ninja Creami.
The machine will spin the frozen base and turn it into creamy ice cream.
The process usually takes about 2–3 minutes.
6. Check the Texture
After the first spin, check the texture.
If the ice cream looks crumbly or dry, press the Re-Spin button.
This helps create a smoother and creamier consistency.
Small tip: Adding 1 tablespoon of milk before re-spinning can help improve the texture.
7. Add Mix-Ins (Optional)
If you want to add nuts or chocolate chips, make a small hole in the center of the ice cream.
Add the mix-ins and select the Mix-In function.
The machine will evenly distribute them throughout the ice cream.
8. Serve
Scoop the ice cream into bowls or cones.
Serve immediately for the creamiest texture.
Tips & Variations
Make it lighter
Use half-and-half instead of heavy cream.
Add cinnamon
A small pinch of cinnamon adds warm flavor.
Make it vegan
Use coconut milk and plant-based cream.
Make it gluten-free
This recipe is naturally gluten-free.
Try different toppings
Maple ice cream pairs well with granola, caramel sauce, or toasted nuts.
Small tip: Always freeze the base completely flat for the best results.
Nutritional Information (Approximate per Serving)
Serving size: 1 portion
- Calories: 290
- Protein: 3 g
- Carbohydrates: 26 g
- Fat: 20 g
- Fiber: 0 g
- Sugar: 22 g
Values may vary depending on ingredients used.
Health Benefits
While ice cream is a treat, this recipe includes some ingredients that provide benefits.
Maple syrup
Pure maple syrup contains small amounts of minerals such as zinc and manganese.
Milk and cream
Dairy products provide calcium, which supports bone health.
Homemade ingredients
Making ice cream at home allows you to control the sweetness and avoid artificial ingredients.
You can also reduce sugar or add healthier mix-ins like nuts.
Serving Suggestions
Ninja Creami Maple Ice Cream can be enjoyed in many delicious ways.
With pancakes or waffles
A scoop of maple ice cream on warm pancakes makes a unique dessert.
With apple pie
The maple flavor pairs perfectly with baked apple desserts.
With nuts
Sprinkle toasted pecans or walnuts on top.
With cookies
Serve alongside oatmeal or chocolate chip cookies.
Storing Leftovers
- Store leftover ice cream in the Ninja Creami container in the freezer.
- If it becomes too firm, use the Re-Spin function before serving again.
Conclusion
Ninja Creami Maple Ice Cream is a simple and delicious dessert that highlights the rich, natural flavor of maple syrup. With just a few ingredients and the help of the Ninja Creami machine, you can create a creamy homemade ice cream that tastes amazing.
This recipe is easy to customize with different toppings or mix-ins. It is perfect for dessert lovers who enjoy smooth ice cream with a warm and comforting flavor.
Try making Ninja Creami Maple Ice Cream at home and share it with family and friends. Its creamy texture and natural sweetness make it a dessert that everyone will enjoy!
Helpful Cooking Tools
Ninja Creami Maple Ice Cream
Introduction Ninja Creami Maple Ice Cream is a smooth, creamy dessert with a rich and natural maple flavor. It is sweet, comforting, and perfect for anyone who enjoys classic homemade...