Introduction
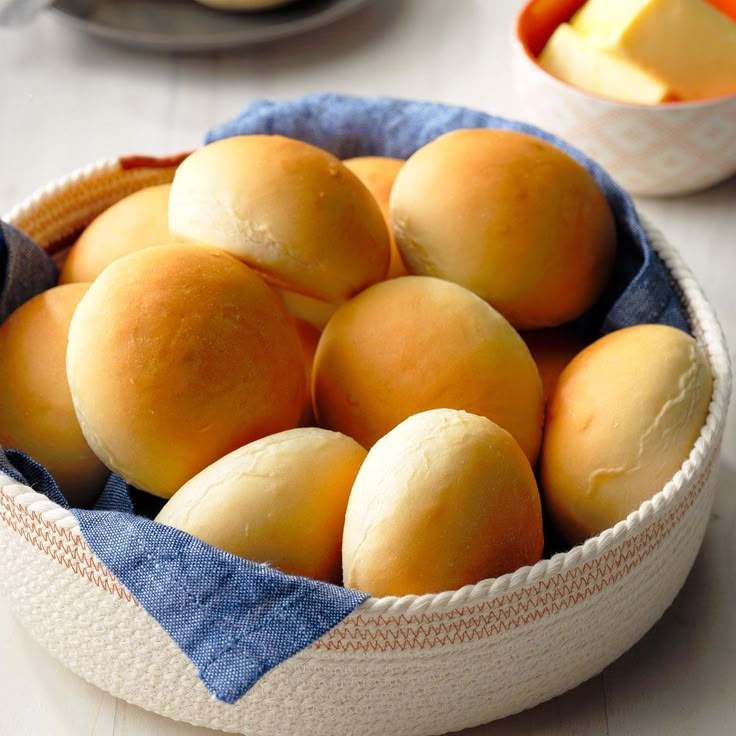
Hello, lovely bakers! Today, we’re diving into the wonderful world of homemade Simple Dinner Rolls. Imagine warm, fluffy rolls, golden brown and perfectly soft, ready to soak up all your favorite gravies and sauces. These rolls are a true classic, bringing comfort and joy to any meal.
You might think making bread from scratch is complicated, but I promise you, these dinner rolls are surprisingly easy. We’re using simple ingredients and straightforward steps that even a beginner can master. They don’t take a lot of active time, making them perfect for a weekend project or even a weeknight treat.
There’s nothing quite like the smell of fresh bread baking in your kitchen. It’s an experience that truly transforms a house into a home. So, roll up your sleeves, gather your ingredients, and let’s make some incredibly delicious dinner rolls together!
Cooking Time & Prep Time
- Prep Time: 25 minutes (active) + 120 minutes (rising)
- Cooking Time: 15-20 minutes
- Total Time: Approximately 2 hours 40 minutes
Small tip: The rising times are estimates. Your dough might rise faster or slower depending on the warmth and humidity of your kitchen. Look for the dough to double in size, not just a specific time.
Ingredients
Makes 12-16 dinner rolls
- 1 cup (240ml) warm milk (around 105-115°F / 40-46°C)
- 2 ¼ teaspoons (1 packet) active dry yeast
- 2 tablespoons granulated sugar, divided
- ½ cup (113g) unsalted butter, melted and cooled, plus extra for brushing
- 1 large egg, at room temperature
- 1 teaspoon salt
- 3 ½ – 4 cups (420-480g) all-purpose flour, plus more for dusting
Step-by-Step Instructions
Step 1: Activate the Yeast
In a large mixing bowl, combine the warm milk and 1 tablespoon of granulated sugar. Sprinkle the active dry yeast over the top. Stir gently. Let this mixture sit for 5-10 minutes until it becomes foamy. This foam means your yeast is alive and ready to work!
Small tip: If your yeast doesn’t foam, your milk might have been too hot or too cold, or your yeast might be old. Start again with fresh yeast and properly warmed milk.
Step 2: Mix the Wet Ingredients
Once the yeast is foamy, add the melted and cooled butter, the room temperature egg, the remaining 1 tablespoon of sugar, and the salt to the bowl. Whisk everything together until it is well combined. This creates the rich base for your dough.
Step 3: Add the Flour
Gradually add the flour to the wet ingredients, starting with 3 cups. Mix with a wooden spoon or a dough hook on a stand mixer until a shaggy dough forms. If the dough is still very sticky, add the remaining flour a little at a time, until the dough pulls away from the sides of the bowl.
Small tip: Don’t add too much flour too quickly! A slightly sticky dough is better than a dry, tough one. You can always add a little more during kneading.
Step 4: Knead the Dough
Turn the dough out onto a lightly floured surface. Knead for 5-7 minutes by hand, or 4-5 minutes with a stand mixer on medium speed. The dough should become smooth, elastic, and springy. It should also be less sticky.
Step 5: First Rise
Lightly grease a clean large bowl with a little oil. Place the dough in the bowl, turning it once to coat the top. Cover the bowl tightly with plastic wrap or a clean kitchen towel. Let the dough rise in a warm place for 60-90 minutes, or until it has doubled in size.
Small tip: A slightly warm oven (turned off, with the light on) or a sunny spot on your counter can be a great place for dough to rise.
Step 6: Shape the Rolls
Gently punch down the risen dough to release the air. Turn it out onto a lightly floured surface. Divide the dough into 12-16 equal pieces. Shape each piece into a smooth ball by tucking the edges underneath and rolling it gently against your counter with your palm.
Step 7: Second Rise
Arrange the shaped rolls in a greased 9×13 inch baking pan, leaving a little space between each one. Cover the pan loosely with plastic wrap or a kitchen towel. Let the rolls rise again in a warm place for 30-45 minutes, or until they look puffy and have nearly doubled in size.
Small tip: For extra golden tops, you can brush the rolls with an egg wash (1 egg beaten with 1 tablespoon water) before the second rise.
Step 8: Bake the Rolls
Preheat your oven to 375°F (190°C) during the last 15 minutes of the second rise. Bake the rolls for 15-20 minutes, or until they are golden brown on top and sound hollow when tapped on the bottom. The internal temperature should be around 200-210°F (93-99°C).
Step 9: Finish and Serve
Once baked, remove the rolls from the oven. For extra shine and softness, brush the tops immediately with a little melted butter. Let them cool in the pan for a few minutes before transferring them to a wire rack. Serve warm and enjoy!
Small tip: Brushing with melted butter right out of the oven makes the crust super tender and adds a lovely flavor.
Tips & Variations
- Gluten-Free Option: Substitute the all-purpose flour with a 1:1 gluten-free baking flour blend that contains xanthan gum. You might need slightly more liquid, so add it slowly until the dough reaches the right consistency.
- Vegan Option: Replace the milk with a plant-based milk (like unsweetened almond or soy milk), the butter with a vegan butter substitute, and the egg with a flax egg (1 tablespoon ground flaxseed + 3 tablespoons water, let sit for 5 minutes).
- Add Herbs: For an herbaceous touch, knead in 1-2 tablespoons of finely chopped fresh herbs like rosemary, thyme, or chives with the flour. This adds a wonderful savory depth.
- Garlic Parmesan Rolls: After brushing with melted butter, sprinkle the warm rolls with a mix of garlic powder and grated Parmesan cheese. This makes them irresistible!
- Sweet Rolls: Increase the sugar to ¼ cup and add ½ teaspoon of cinnamon to the dough. After baking, drizzle with a simple glaze made from powdered sugar and a splash of milk or vanilla extract.
Nutritional Information
Approximate values per serving (based on 16 servings):
- Calories: 180 kcal
- Protein: 5g
- Carbohydrates: 26g
- Fat: 7g
Please note: These values are approximate and may vary depending on the specific brands and quantities of ingredients used.
Health Benefits
While these rolls are a treat, they do offer some nutritional benefits from their main ingredients.
Flour, especially if you use unbleached varieties, provides carbohydrates for energy. It also contains some B vitamins like niacin, thiamine, and riboflavin, which are important for metabolism.
Milk contributes essential nutrients like calcium, crucial for strong bones and teeth. It also provides vitamin D (if fortified), which aids in calcium absorption, and protein for muscle repair and growth.
Eggs are a fantastic source of high-quality protein, providing all nine essential amino acids. They also contain vitamins A, D, E, B12, and minerals like iron and selenium, supporting overall health and immunity.
Yeast, an active ingredient, is a good source of B vitamins, especially B12 in nutritional yeast varieties, which are vital for nerve function and red blood cell formation. It also helps with digestion and nutrient absorption.
Serving Suggestions
- Serve these warm rolls alongside a hearty stew, chili, or your favorite soup for a comforting meal.
- They make an excellent side dish for holiday dinners, Sunday roasts, or any family gathering.
- Slice them open and use them as mini sandwich buns for sliders, or alongside a charcuterie board.
- For breakfast, toast them lightly and spread with jam, honey, or your favorite nut butter.
Storage Tips
Store leftover dinner rolls in an airtight container at room temperature for up to 2-3 days. For longer storage, they can be frozen for up to 3 months. Wrap individual rolls tightly in plastic wrap, then place them in a freezer-safe bag. To reheat, thaw frozen rolls at room temperature, then warm them in a preheated oven at 350°F (175°C) for 5-7 minutes, or until soft and warm.
Conclusion
There you have it – incredibly simple, wonderfully delicious, homemade dinner rolls. These rolls are more than just a side dish; they’re a symbol of warmth, comfort, and the joy of home baking. The process is so rewarding, and the result is truly irresistible.
Don’t hesitate to give this recipe a try. You’ll be amazed at how easy it is to create such a delightful staple from scratch. Your kitchen will smell incredible, and your taste buds will thank you.
Bake a batch today and share them with your loved ones. There’s nothing quite like breaking bread together. Happy baking!
Helpful Cooking Tools
Simple Dinner Rolls
Introduction Hello, lovely bakers! Today, we're diving into the wonderful world of homemade Simple Dinner Rolls. Imagine warm, fluffy rolls, golden brown and perfectly soft, ready to soak up all...