Introduction
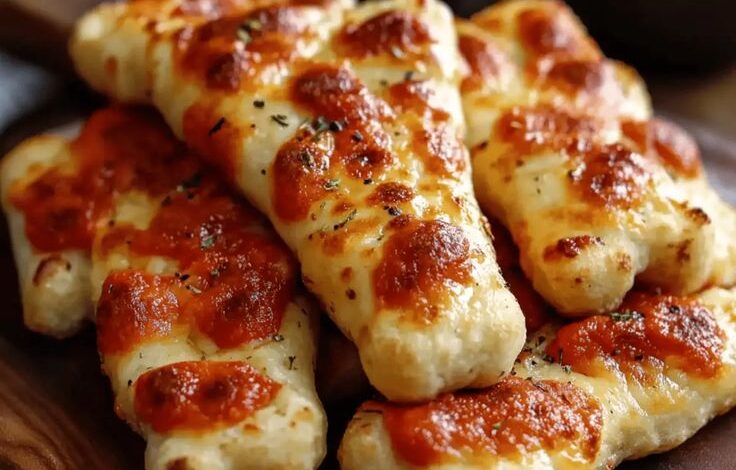
Cheesy Halloween Breadstick Bones are a fun and tasty snack that is perfect for Halloween parties, family movie nights, or festive gatherings. These breadsticks are shaped like little bones, which makes them playful and perfect for the spooky season. Even though they look creative, they are actually very easy to make.
The breadsticks are soft on the inside and slightly crispy on the outside. Inside, they are filled with melted cheese that makes every bite warm and delicious. The outside is brushed with garlic butter and sometimes sprinkled with herbs for extra flavor.
Kids especially love these breadsticks because of their unique shape. Adults enjoy them too because they taste like cheesy garlic bread. You can serve them as a snack, appetizer, or even as a side dish with soup or pasta.
The best part is that this recipe uses simple ingredients and easy steps. You do not need special baking skills. With a little shaping and creativity, anyone can make these spooky breadstick bones.
If you want a Halloween recipe that is both fun and delicious, Cheesy Halloween Breadstick Bones are a perfect choice.
Cooking Time & Prep Time
- Prep Time: 20 minutes
- Cooking/Baking Time: 15–18 minutes
- Total Time: About 40 minutes
- Servings: 10–12 breadstick bones
These breadsticks bake quickly, so they are great when you need a festive snack in a short time.
Ingredients
- 1 can refrigerated pizza dough (about 13–14 oz)
- 1 cup shredded mozzarella cheese
- 2 tablespoons melted butter
- 1 teaspoon garlic powder
- ½ teaspoon salt
- ½ teaspoon dried oregano (optional)
- ½ teaspoon dried parsley (optional)
Optional Dipping Sauces
- Marinara sauce
- Pizza sauce
- Garlic butter
- Ranch dressing
Tip: String cheese sticks can also be used instead of shredded cheese for an extra cheesy center.
Step-by-Step Instructions
1. Preheat the Oven
Start by preheating your oven to 375°F (190°C).
Line a baking sheet with parchment paper or lightly grease it with oil. This prevents the breadsticks from sticking while baking.
2. Prepare the Dough
Open the refrigerated pizza dough and place it on a lightly floured surface.
Use your hands or a rolling pin to flatten the dough slightly.
Cut the dough into 10–12 long strips using a knife or pizza cutter.
These strips will form the bones.
3. Add the Cheese Filling
Take a small amount of shredded mozzarella and place it along the center of each dough strip.
Be careful not to add too much cheese. Too much filling can cause the dough to open while baking.
Fold the dough over the cheese and gently pinch the edges to seal it.
4. Shape the Bone Ends
Now comes the fun part—creating the bone shape.
At each end of the dough strip, gently roll the dough into small round bumps. These bumps look like the ends of a bone.
You should have two small rounded sections at each end and a thin center section.
Place each shaped breadstick onto the prepared baking sheet.
Tip: Leave a little space between each breadstick so they bake evenly.
5. Prepare the Garlic Butter
In a small bowl, mix the melted butter, garlic powder, salt, oregano, and parsley.
Stir well until everything is combined.
This mixture adds flavor and gives the breadsticks a golden color.
6. Brush the Breadsticks
Use a pastry brush or spoon to spread the garlic butter mixture over the breadstick bones.
Make sure each one is lightly coated.
This step helps the breadsticks become flavorful and slightly crispy on the outside.
7. Bake the Breadstick Bones
Place the baking sheet in the oven.
Bake for 15–18 minutes, or until the breadsticks turn golden brown.
You may see some melted cheese bubbling slightly from the sides.
Remove the breadsticks from the oven and allow them to cool for a few minutes before serving.
Tips & Variations
This recipe can be easily customized to suit different tastes.
Add more cheese:
Mix cheddar, Monterey Jack, or Parmesan with mozzarella for extra flavor.
Make it spicy:
Add red pepper flakes or chopped jalapeños to the cheese filling.
Make it gluten-free:
Use gluten-free pizza dough instead of regular dough.
Make it vegan:
Use dairy-free pizza dough, vegan butter, and plant-based cheese.
Add herbs:
Fresh basil or rosemary can give the breadsticks a fresh aroma.
Create spooky designs:
You can use olives to create small “eyes” or shapes for extra Halloween fun.
Small changes like these can make the recipe even more exciting.
Nutritional Information (Approximate per serving)
- Calories: 180
- Protein: 6 g
- Carbohydrates: 22 g
- Fat: 7 g
- Fiber: 1 g
- Sugar: 2 g
These values may vary depending on the ingredients used.
Health Benefits
While Cheesy Halloween Breadstick Bones are a fun snack, they also contain ingredients that offer some nutritional benefits.
Cheese provides protein and calcium. Protein helps build and repair muscles, while calcium supports strong bones and teeth.
Garlic contains natural compounds that may help support the immune system and heart health.
Herbs like oregano and parsley contain antioxidants and vitamins that support overall health.
If you want to make the breadsticks healthier, you can use whole wheat pizza dough or reduce the amount of butter.
Adding a side of vegetable dip or salad can also balance the meal.
Serving Suggestions
Cheesy Halloween Breadstick Bones are best served warm while the cheese inside is still melted and soft.
They are perfect for:
- Halloween parties
- Kids’ school events
- Family movie nights
- Spooky snack tables
Dipping Ideas
Serve the breadsticks with dipping sauces such as:
- Marinara sauce
- Pizza sauce
- Garlic butter
- Ranch dressing
- Cheese dip
Dipping sauces make the breadsticks even more fun to eat.
Pairing Ideas
These breadsticks pair well with:
- Tomato soup
- Pumpkin soup
- Pasta dishes
- Fresh salads
The warm breadsticks balance nicely with soups and sauces.
Storing Leftovers
If you have leftover breadsticks, store them in an airtight container in the refrigerator for up to 3 days.
To reheat, place them in the oven at 350°F (175°C) for about 5 minutes or warm them in an air fryer.
Avoid microwaving for too long because it may make the breadsticks soft instead of crispy.
Freezing
You can also freeze baked breadsticks for up to 1 month. Reheat them in the oven before serving.
Conclusion
Cheesy Halloween Breadstick Bones are a fun and delicious recipe that adds creativity to any Halloween celebration. Their playful bone shape makes them perfect for the spooky season, while the cheesy garlic flavor makes them irresistible.
The recipe is simple, quick, and beginner-friendly. With basic ingredients and easy steps, anyone can create these festive breadsticks at home.
They can be served as snacks, appetizers, or side dishes, and they pair well with many sauces and soups.
If you are planning a Halloween party or just want a fun cooking activity with family, try making these Cheesy Halloween Breadstick Bones. They are sure to bring smiles and maybe a few spooky laughs to the table!
Helpful Cooking Tools
Cheesy Halloween Breadstick Bones
Introduction Cheesy Halloween Breadstick Bones are a fun and tasty snack that is perfect for Halloween parties, family movie nights, or festive gatherings. These breadsticks are shaped like little bones,...