Introduction
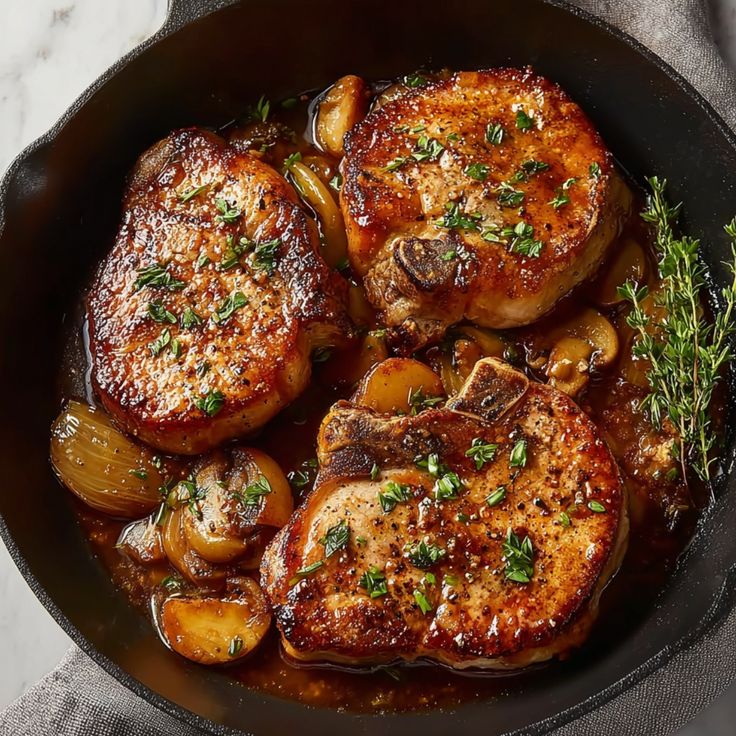
Thick-cut pork chops are juicy, flavorful, and very satisfying. When cooked the right way, they turn out tender on the inside with a beautiful golden crust on the outside. Many people worry that pork chops will become dry, but this recipe solves that problem with a simple cooking method that locks in moisture.
This dish is perfect for both weeknight dinners and special family meals. It uses basic ingredients, takes little effort, and delivers restaurant-quality results at home. Even if you are new to cooking, you can make these pork chops successfully by following the steps below.
Cooking Time & Prep Time
- Prep Time: 10 minutes
- Cooking Time: 20–25 minutes
- Total Time: About 35 minutes
Ingredients
- 4 thick-cut pork chops (about 1 to 1½ inches thick)
- 2 tablespoons olive oil
- 3 cloves garlic, minced
- 1 teaspoon salt
- 1 teaspoon black pepper
- 1 teaspoon paprika
- 1 teaspoon dried thyme (or rosemary)
- 2 tablespoons butter
- ½ cup chicken broth (or water)
- 1 tablespoon lemon juice (optional, for freshness)
- Fresh parsley for garnish (optional)
Step-by-Step Instructions
Step 1: Bring the Pork Chops to Room Temperature
Remove the pork chops from the refrigerator 15–20 minutes before cooking.
This helps them cook evenly and stay juicy.
Small Tip: Cold meat placed directly into a hot pan can become tough.
Step 2: Season Generously
Pat the pork chops dry using paper towels.
Rub both sides with salt, pepper, paprika, and thyme. Make sure every part is coated.
Drying the meat first helps create a better crust when cooking.
Step 3: Heat the Pan
Place a large skillet (cast iron works best) over medium-high heat.
Add the olive oil and allow it to get hot, but not smoking.
Step 4: Sear the Pork Chops
Carefully place the pork chops into the hot pan.
Let them cook without moving for about 4–5 minutes.
This step creates a rich golden crust that adds flavor.
Flip the pork chops and cook the other side for another 4–5 minutes.
Step 5: Add Butter and Garlic
Lower the heat to medium.
Add butter and minced garlic to the pan.
As the butter melts, tilt the pan slightly and spoon the butter over the pork chops repeatedly. This is called basting, and it keeps the meat moist and flavorful.
Step 6: Finish Cooking
Pour in the chicken broth and add lemon juice if using.
Cover the pan loosely and cook for another 5–8 minutes.
The pork chops are done when the inside is no longer pink and the juices run clear.
Simple Check: If you have a thermometer, aim for 63°C (145°F) internal temperature.
Step 7: Let Them Rest
Remove the pork chops from the pan and let them rest for 5 minutes before serving.
Resting allows the juices to settle back into the meat, keeping every bite tender.
Tips & Variations
1. For Extra Flavor:
Add sliced onions or mushrooms to the pan while cooking. They soak up the juices and taste amazing.
2. Spice It Up:
Add chili flakes or cayenne pepper for heat.
3. Herb Swap:
Use rosemary, oregano, or fresh herbs instead of dried thyme.
4. Gluten-Free Option:
This recipe is naturally gluten-free. Just ensure your broth contains no added wheat.
5. Dairy-Free Version:
Replace butter with more olive oil or a plant-based alternative.
6. Lower-Sodium Choice:
Use reduced-sodium broth and slightly less salt.
7. Oven Finish Method:
After searing, transfer the pan to a preheated oven at 200°C (400°F) for 6–8 minutes for even cooking.
Nutritional Information (Approximate Per Serving)
- Calories: 320–380 kcal
- Protein: 30–35 g
- Carbohydrates: 2–3 g
- Fat: 20–24 g
- Iron: 6% of daily value
- Zinc: 15% of daily value
Values vary depending on chop size and ingredients used.
Health Benefits
High in Protein
Pork chops are an excellent source of protein, which helps build muscles and keeps you full longer.
Rich in Vitamins and Minerals
They provide B vitamins like B6 and B12, which support energy production and brain function.
Supports Immune Health
Pork contains zinc, an important mineral that helps the body fight illness.
Balanced Meal Option
When paired with vegetables, this dish becomes a well-rounded, nutritious dinner.
Healthy Cooking Method
Pan-searing with minimal oil keeps the meal lighter than deep frying.
Serving Suggestions
Best Side Dishes:
- Mashed potatoes or roasted potatoes
- Steamed vegetables like carrots, green beans, or broccoli
- Rice or quinoa
- Fresh salad with lemon dressing
For a Lighter Meal:
Serve with sautéed spinach or a tomato cucumber salad.
Storage Tips:
- Refrigerate leftovers in an airtight container for up to 3 days.
- Reheat gently in a pan with a splash of broth to prevent drying out.
Freezing:
Cooked pork chops can be frozen for up to 2 months. Thaw overnight before reheating.
Conclusion
Thick-cut pork chops are simple to prepare yet incredibly delicious. With the right seasoning, a good sear, and a little patience, you can create a meal that is juicy, tender, and full of flavor every time. This recipe is easy enough for beginners but tasty enough to impress family and guests.
Try it for your next dinner, experiment with your favorite herbs, and enjoy the comfort of a homemade meal. Don’t forget to share it with friends and loved ones—great food is always better when enjoyed together!

Helpful Cooking Tools
Thick-Cut Pork Chops Recipe
Introduction Thick-cut pork chops are juicy, flavorful, and very satisfying. When cooked the right way, they turn out tender on the inside with a beautiful golden crust on the outside....