Introduction
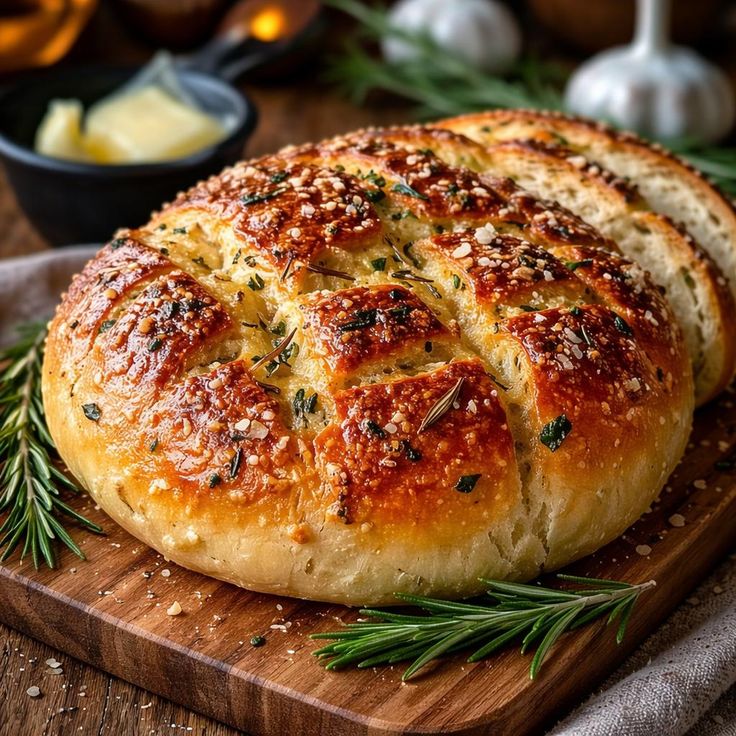
Rustic no-knead rosemary garlic bread is soft inside, crispy outside, and full of warm, cozy flavor. This is a simple homemade bread that does not need special skills or heavy work. You only mix the dough, let it rest, and bake it.
The smell of fresh rosemary and roasted garlic makes this bread very special. It is great for family meals, snacks, or even breakfast with butter. The best part is that you do not need to knead the dough. Just mix, wait, and bake!
This recipe is perfect if you are new to bread making. Do not worry if you have never baked bread before. Follow the steps slowly, and you will get a beautiful rustic loaf.
Cooking Time & Prep Time
- Prep time: About 10 – 15 minutes
- Resting time: 8 – 12 hours (overnight is best)
- Baking time: 35 – 45 minutes
- Total time: About 9 – 13 hours (most of it is waiting time)
Tip: Make the dough at night and bake it in the morning.
Ingredients
You only need simple ingredients to make this rustic bread.
- 3 cups all-purpose flour
- 1½ teaspoons salt
- ½ teaspoon instant yeast
- 1½ cups warm water (not hot)
- 2 tablespoons olive oil
- 3 cloves garlic, minced or finely chopped
- 1 tablespoon fresh rosemary, chopped (or 1 teaspoon dried rosemary)
Optional but nice:
- Extra rosemary leaves for topping
- A little olive oil for brushing
Small tip: Fresh rosemary gives stronger aroma, but dried rosemary also works well.
Step-by-Step Instructions
Step 1: Mix the Dry Ingredients
Take a large mixing bowl.
Add flour, salt, and yeast.
Mix them gently using a spoon.
Make sure the yeast and salt spread evenly in the flour.
This helps the bread rise well later.
Step 2: Add Water and Olive Oil
Pour warm water slowly into the bowl.
Add olive oil.
Mix everything until you see a sticky dough.
The dough will look wet and messy. This is normal.
Do not try to make it smooth by adding too much flour.
Rustic bread should be a little sticky.
Step 3: Add Garlic and Rosemary
Put the chopped garlic and rosemary into the dough.
Fold the dough gently with a spoon or your hands.
Mix until the garlic and herbs are inside the dough.
Try not to overmix. Just make sure the ingredients are combined.
Step 4: Let the Dough Rest
Cover the bowl with plastic wrap or a clean kitchen towel.
Leave it at room temperature.
Let the dough rest for 8 to 12 hours.
The dough will grow and become bubbly.
This long resting time helps create soft bread with good flavor.
Tip: If your kitchen is cold, place the bowl in a slightly warm place.
Step 5: Prepare the Oven and Baking Pan
When you are ready to bake, heat your oven to 450°F (230°C).
Put a cast iron pot or baking pan inside the oven while it heats.
The hot pot helps make the bread crust crispy.
If you do not have a cast iron pot, use a normal baking tray.
Step 6: Shape the Dough
Take the dough out of the bowl.
Put it on a lightly floured surface.
Fold the dough edges to the center 3 or 4 times.
You do not need serious kneading.
Make a round or oval loaf shape.
Step 7: Second Rest (Important but Short)
Place the shaped dough on parchment paper.
Cover it and let it rest for about 20 – 30 minutes.
This step helps the bread rise a little more before baking.
Step 8: Bake the Bread
Carefully take the hot pot out of the oven.
Lift the dough using the parchment paper.
Put the dough inside the hot pot.
Cover with the lid if using a cast iron pot.
Bake for 30 minutes.
After 30 minutes, remove the lid and bake for another 10 – 15 minutes.
The top should become golden brown.
The bread is ready when the crust looks crispy and sounds hollow when tapped.
Step 9: Cool Before Cutting
Take the bread out of the oven.
Put it on a cooling rack.
Wait at least 20 minutes before cutting.
This step is very important. Cutting too early can make the bread inside sticky.
Tips & Variations
You can change this recipe in many ways.
- For more garlic flavor, add roasted garlic pieces into the dough.
Roasted garlic is softer and sweeter than raw garlic. - If you like stronger herb smell, add thyme or oregano.
- For a vegan version, this recipe is already good because it uses no animal products.
- For gluten-free bread, you can try gluten-free baking flour mix.
But remember that texture may be slightly different. - If you want softer bread, add 1 tablespoon more olive oil.
- If you like spicy taste, add small chili flakes.
- You can sprinkle sea salt and rosemary leaves on top before baking.
Small reminder: Do not add too much flour when handling the dough. Sticky dough makes better rustic bread.
Nutritional Information
These values are only estimates because ingredients and portion size can change.
Per serving (one slice, about 80–100g):
- Calories: 180 – 220 kcal
- Protein: 5 – 6 g
- Carbohydrates: 35 – 40 g
- Fat: 4 – 6 g
- Fiber: 2 – 3 g
If you add more olive oil or toppings, calories may increase.
Health Benefits
This rustic bread has some good nutritional value when eaten in moderation.
Garlic is known to support body immunity and may help heart health. It also adds strong natural flavor, so you need less salt.
Rosemary contains natural plant compounds that may help digestion and reduce inflammation.
Olive oil provides healthy fats that are better for the heart compared to some other cooking fats.
Whole family members can enjoy this bread as part of a balanced diet.
Remember, bread is best when eaten with vegetables, protein foods, and fruits.
Serving Suggestions
Rustic no-knead rosemary garlic bread tastes best when it is slightly warm.
You can serve it in many ways:
- Spread butter or olive oil on a slice.
- Eat with soup, stew, or salad.
- Use it for sandwiches.
- Toast slices lightly for breakfast.
This bread stays fresh for about 2 days at room temperature if covered well.
For longer storage, put it in a plastic bag and keep it in the refrigerator for up to 5 days.
If the bread becomes hard, you can warm it in the oven for 5 minutes.
Do not store bread in a very wet container because it can grow mold quickly.
Conclusion
Rustic no-knead rosemary garlic bread is simple, tasty, and fun to make. You do not need to be an expert baker to enjoy fresh homemade bread. Just mix the dough, wait patiently, and bake.
The wonderful smell of rosemary and garlic will fill your kitchen. Your family and friends will love this warm, crispy bread.
Try this recipe at home and enjoy the comfort of homemade baking. Share it with people you love, or keep it for your own snack time.
Happy baking!
Helpful Cooking Tools
Rustic No-Knead Rosemary Garlic Bread
Introduction Rustic no-knead rosemary garlic bread is soft inside, crispy outside, and full of warm, cozy flavor. This is a simple homemade bread that does not need special skills or...