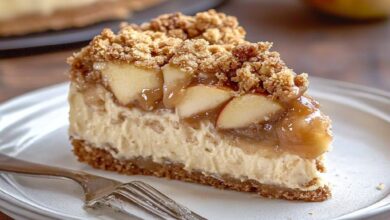
There’s something truly magical about a Japanese cheesecake. Unlike the dense, rich cheesecakes you might be used to, this one feels like a cloud—light, airy, and just a little sweet, with a subtle tang that makes it irresistible. The first time I tried Japanese cheesecake, I remember taking a bite and feeling my fork sink effortlessly into the soft, pillowy texture. It’s the kind of dessert that makes you want to close your eyes, take a slow bite, and savor every moment.
Originating in Japan in the 1960s, this cheesecake is often called “soufflé cheesecake” because of its delicate rise and melt-in-your-mouth softness. It’s lighter than traditional Western cheesecakes, yet it still carries that creamy richness that makes cheesecake so comforting. Making it at home may sound intimidating, but I promise—with a little patience and care—you can create a cake that looks and tastes like it came straight from a Japanese patisserie. Let’s dive in and make this dreamy dessert together!
Prep & Cooking Time
- Prep time: 25 minutes
- Cooking time: 50–60 minutes
- Cooling time: 1 hour
- Total time: ~2 hours 15 minutes
Ingredients
For a 7-inch cake (serves 6–8):
- 250g (9 oz) cream cheese, softened
- 50g (1/4 cup) unsalted butter, softened
- 100ml (1/2 cup) whole milk
- 60g (1/2 cup) granulated sugar, divided
- 6 large eggs, separated
- 60g (1/2 cup) cake flour, sifted
- 20g (2 tbsp) cornstarch, sifted
- 1/4 tsp cream of tartar (optional, for stabilizing egg whites)
- 1 tsp vanilla extract
- 1/4 tsp salt
- Powdered sugar, for dusting
Step-by-Step Instructions
1. Prepare Your Pan and Oven
Start by preheating your oven to 320°F (160°C). Line the bottom and sides of a 7-inch springform pan with parchment paper. For a super soft texture, we’ll use a water bath. Wrap the outside of the pan with aluminum foil to prevent leaks. This gentle cooking method helps the cheesecake rise evenly and stay moist.
2. Make the Cream Cheese Base
In a medium bowl, combine the softened cream cheese, butter, and milk. Beat until smooth and creamy—don’t rush this step! A lump-free mixture is key for a silky cheesecake. Add in the egg yolks, one at a time, then stir in the vanilla extract and salt.
Sift in the cake flour and cornstarch, folding gently with a spatula. This creates the structure for the cake while keeping it light. Overmixing here can make it dense, so be gentle.
3. Whip the Egg Whites
In a clean, dry bowl, beat the egg whites (and cream of tartar if using) until foamy. Gradually add half of the sugar, then continue whipping until soft peaks form. Slowly add the remaining sugar and beat to stiff peaks. The whipped egg whites are what give this cheesecake its famous airy texture—don’t skip or rush this step!
4. Fold Together
Gently fold one-third of the egg whites into the cream cheese mixture to lighten it. Then fold in the rest carefully, using a spatula in a folding motion. This helps preserve the air and ensures your cake stays fluffy.
5. Bake in a Water Bath
Pour the batter into your prepared pan and place it into a larger baking dish. Fill the outer dish with hot water halfway up the sides of the springform pan. Bake for 50–60 minutes, or until the top is golden brown and a toothpick inserted comes out mostly clean with a few moist crumbs.
6. Cool Slowly
Turn off the oven, crack the door slightly, and let the cheesecake cool in the oven for 15–20 minutes. This prevents sudden shrinking or cracking. Then transfer to a wire rack to cool completely before refrigerating for at least 1 hour. Dust with powdered sugar just before serving.
Tips, Tricks, and Substitutions
- Softening cream cheese and butter: Room temperature ingredients mix more evenly, avoiding lumps.
- Water bath alternative: If you don’t want to use a water bath, reduce the oven temperature to 300°F (150°C) and bake longer for gentler cooking.
- Flour substitutions: Cake flour can be replaced with all-purpose flour plus 1 tsp cornstarch for similar results.
- Flavor variations: Add lemon zest for a citrusy twist, or fold in a teaspoon of matcha powder for a subtle green tea flavor.
Serving Suggestions
Serve this cake on its own, with a dusting of powdered sugar, or pair it with fresh berries, a drizzle of fruit coulis, or a light whipped cream. It also goes beautifully with a cup of green tea or a mild coffee. For celebrations, top with thin slices of fruit for an elegant touch.
Nutritional Information (Approx. per slice, 1/8 cake)
- Calories: 210 kcal
- Protein: 5 g
- Carbs: 18 g
- Fat: 13 g
Health benefits: Cream cheese provides calcium and protein, while eggs offer essential vitamins and healthy fats. Using moderate sugar keeps it lighter than traditional cheesecake, making it a more delicate indulgence.
Storage and Reheating
- Refrigeration: Store in an airtight container for up to 3 days.
- Freezing: Wrap tightly in plastic wrap and foil, then freeze for up to 1 month. Thaw overnight in the fridge.
- Reheating: Best enjoyed chilled, but you can warm individual slices in the microwave for 10–15 seconds for a slightly softer texture.
Final Thoughts
Making a Japanese cheesecake at home is truly a joy. From the first whisk of your egg whites to the moment you cut a slice and see it jiggle ever so slightly, it’s a little slice of happiness. Don’t worry if it isn’t perfect the first time—its charm is in the delicate fluff and the love you put into it. Serve it at a cozy weekend gathering, enjoy a quiet evening treat, or share it with friends and family. Either way, this cake is sure to bring smiles and maybe even a little swoon.
Give this recipe a try, take your time, and savor every melt-in-your-mouth bite—you deserve it!
Helpful Cooking Tools
Japanese Cheesecake
There’s something truly magical about a Japanese cheesecake. Unlike the dense, rich cheesecakes you might be used to, this one feels like a cloud—light, airy, and just a little sweet,...